.png?width=660&height=92&name=help-centre-banner-J-2x%20(2).png)
What is a standalone tool?
For every subject, exam board, and question type on the platform, Top Marks has built a dedicated AI marking tool. Each one has been trained specifically for that question type. So the tool that marks a Shakespeare play question has been trained differently from the one that marks an unseen poetry question, which is different again from the one that marks a history source question.
This means you're never getting a one-size-fits-all approach. Every response is marked by a tool that understands exactly what that question is asking and what the examiner is looking for.
These tools are also benchmarked against real exam board standardisation materials, so you can be confident the feedback and grades are aligned to what an examiner would give.
What can you use standalone tools for?
Standalone tools are ideal for marking a single question type across a group of students. For example:
- A weekly Year 11 English assessment where all students have answered the same Shakespeare question
- A class that has completed a post-1914 drama response
- A History class that has all answered the same source question
If your students have answered multiple different questions (for example, a full exam paper), you would either use the standalone tools separately for each question type, or use Assignment Packs; a software feature that handles multi-question papers all in one go. More on that in the Assignment Packs guide.
Do the questions have to be from past papers?
No. Just as you or a colleague could mark a question you'd never seen before, so can the standalone tools. They have been trained to understand how that type of question is marked; not just a specific set of questions. You can use questions you've written yourself, questions from other sources, or questions you've adapted.
Step-by-step: how to use a standalone tool
Step 1: Choose your tool
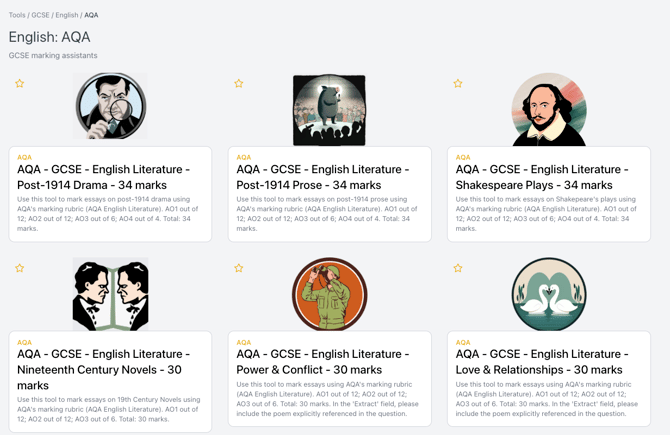
From the homepage (or from the top menu bar, tools > tools), find the subject and qualification you need. Click through to the relevant question type. For example, English GCSE > AQA > Shakespeare Plays, 34 marks.
Step 2: Enter the question details
Every tool has a page where you enter the contextual information students were responding to. This includes:
- The essay title or question
- Any extract the students were given
- Any source image, if relevant (for example, a creative writing prompt or a history poster)
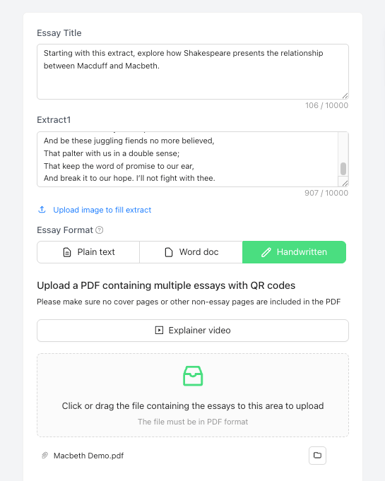
This gives the system the same information you'd want in front of you if you were marking the work yourself. You can type this directly into the boxes, or copy and paste from a saved document. Many teachers find it useful to keep question details saved somewhere so they can copy them in quickly.
Step 3: Choose how to upload the student work
You have a few options:
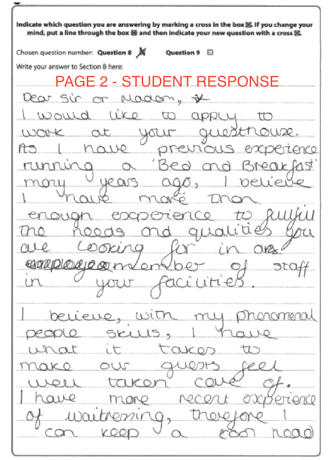
- Handwritten transcription – the most commonly used option. The system will automatically read and transcribe handwritten responses before marking them. You can upload an entire class or cohort as a single PDF.
- Multiple Word documents – if students typed their responses, you can upload several Word documents at once.
- Plain text – you can copy and paste individual typed responses in one at a time.
Tip: If some students typed their responses and others wrote by hand, you don't need two separate uploads. Simply print the typed responses and include them in the same pile as the handwritten work. The system will treat them the same way.
Step 4: Add your student QR codes
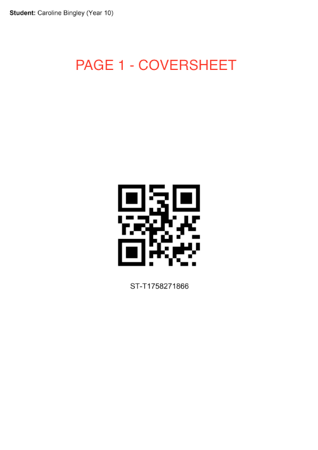
Before scanning in student work, arrange the QR codes in front of each student’s work for those you are uploading. See the How Student QR Codes Work guide for full details on generating and using QR Codes.
Step 5: Upload and go
Drop in your scanned PDF, with student QR Codes and responses in order, and click Perform Marking. The system will first identify all the QR Codes in the file, which is a useful check that everything you expected to upload is actually there. Then it will begin transcribing the handwritten responses.
At this point, you can close the page, close your browser, or even shut down your device. Everything runs in the cloud, so nothing will be lost if your laptop closes or someone else uses the computer.
For guidance on using the weighting or moderation feature in Standalone Tools, see this guide.
Reviewing transcriptions
Upon reviewing the transcribed essays, you will want to navigate to My Ongoing Marking to view processing marking jobs. Once the system has transcribed the student responses, it will ask you to review them before marking begins. You can click through each one to check the accuracy.
The transcription software is reliable, but student handwriting can occasionally catch it out. If any transcription falls below the system's quality threshold, it will flag this with a message so you know to take a closer look, and specific points of interest will be identified within the transcript which may require intervention. You can edit individual words, delete paragraphs, or make any other adjustments needed to make sure it matches what the student actually wrote.
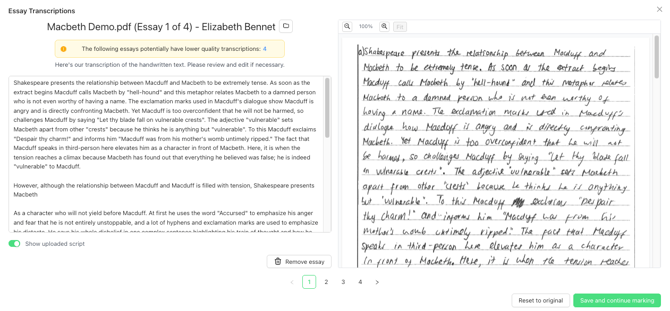
This review step exists to make sure no inaccurate transcription goes through to marking without a teacher having the chance to check it first.
Once you're happy, click Save and Continue Marking.
What happens during marking?
Again, you can step away entirely. The marking runs in the cloud and will continue whether your device is on or not. Many schools start a large batch of marking at the end of the day and come back the next morning to find everything ready.
As each piece of work is marked, the feedback is sent straight to your Feedback area – the system doesn't wait until the whole batch is finished before releasing results.
One important thing to know
Because standalone tools are specialists, they are also specific. Each tool is designed to mark one type of question at a time.
This means two things:
- Only upload responses for that question type. Make sure there are no stray paragraphs from a different question included in any student's response; for example, the last paragraph of a previous question or the first line of the next one. The system only expects to see the response for the question it's been set up to mark.
- If students answered different versions of the question – for example, some students wrote about Macbeth and others wrote about Romeo and Juliet, you will need to separate these into different marking rounds, since the system checks whether students are actually responding to the question that was set.
Where to find your results
Go to Tools → My Ongoing Marking to check on progress at any time. Once marking is complete, all feedback will be waiting for you in My Feedback.
Still unsure? The support chat in the bottom-right corner of the website connects you directly to a real person on the Top Marks team – not an AI bot, ironically! Don't hesitate to reach out at any point.